PostgreSQL14.10+TimeScaleDB2.13.1数据库部署
前因
因zabbix换成PostgreSQL,因此进行记录
数据库安装步骤分为:
- 安装编译的依赖环境
- 编译和构建pgsql
- 数据库初始化
- 数据库配置文件
- 添加TimeScaleDB插件
PostgreSQL部署
安装编译的依赖环境
在编译过程中,如提示缺少相关包的错误,一般情况下只需安装其对应的devel包即可解决问题,而CentOS的Yum Base仓会满足大部分场景。
# yum install -y perl-ExtUtils-Embed readline-devel zlib-devel pam-devel libxml2-devel libxslt-devel python-devel gcc-c++ openssl-devel cmake gcc readline-devel lbzip2 systemd-devel tcl-devl net-tools lrzsz
编译和构建pgsql
下载postgresql源码包
访问 https://www.postgresql.org/ftp/source/,选择对应版本,点击之后,下载对应的tar.gz源码包,然后将其上传到服务器指定路径。本次使用是postgresql-14.10.tar.gz
编译和构建
#在/usr/local/src/下目录存放安装包
cd /usr/local/src/
# 解压pgsql14安装包
tar -xzf postgresql-14.10.tar.gz
# 编译postgresql
cd postgresql-14.10/
./configure --prefix=/AppHome/postgresql-14

#构建和安装postgresql
make -j4 && make install

#pgsql安装目录下建立软链接来管理应用的版本
cd /AppHome/ && ln -s postgresql-14 postgresql
数据库初始化
#创建postgres用户
groupadd postgres && useradd -g postgres postgres

#设置postgres用户密码
echo '123456' | passwd --stdin postgres

#写入postgres程序的系统变量
cat > /etc/profile.d/pgsql.sh << EOF
### postgres ###
export PGUSER=postgres
export PGPORT=8306
export PGHOME=/AppHome/postgresql
export PGDATA=\${PGHOME}/data
export PGLOG=\${PGHOME}/logs/pgsql.log
export PATH=\${PGHOME}/bin:\$PATH
export LD_LIBRARY_PATH=\${PGHOME}/lib:\$LD_LIBRARY_PATH
EOF
chmod +x /etc/profile.d/pgsql.sh

#重新加载系统的环境变量
source /etc/profile

#测试环境变量是否生效,查看pgsql版本
pg_config | tail -n 1

#创建pgsql数据和日志保存目录
mkdir -p ${PGHOME}/{data,logs}

#授权postgres用户pgsql安装目录
chown -R postgres:postgres /AppHome/postgresql
chown -R postgres:postgres /AppHome/postgresql-14

#切换至postgres用户进行数据库初始化
su - postgres
#初始化数据库
/AppHome/postgresql/bin/initdb -D $PGDATA -U postgres --locale=en_US.UTF8 -E UTF8
数据库配置文件
postgres用户执行
#修改pgsql的基础设置
vim /AppHome/postgresql/data/postgresql.conf

#修改内容1:修改pgsql监听地址和端口
# - Connection Settings -
listen_addresses = '*'                  # what IP address(es) to listen on;
port = 8306                             # (change requires restart)
max_connections = 200                   # (change requires restart)

#------------------------
# 修改pgsql的客户端认证方式
vim /opt/apps/postgresql/data/pg_hba.conf

#增加内容1:增加一行允许所有的IPv4客户端连接(md5)
# IPv4 local connections:
host    all             all             0.0.0.0/0               md5

#------------------------
# 启动数据库/停止数据库
/AppHome/postgresql/bin/pg_ctl start -D $PGDATA -s -l $PGLOG
/AppHome/postgresql/bin/pg_ctl stop -D $PGDATA -s -m fast
配置系统服务
root用户执行
#进入postgresql源码包的解压目录
cd /usr/local/src/postgresql-14.10/contrib/start-scripts/
#复制
cp ./linux /etc/init.d/postgresql

#然后进行配置修改
vim /etc/init.d/postgresql
#如下:
prefix=/AppHome/postgresql
PGDATA="/AppHome/postgresql/data"
PGUSER=postgres
PGLOG="/AppHome/postgresql/logs/pgsql.log"
# PGLOG="$PGDATA/serverlog"

#授权
chmod +x /etc/init.d/postgresql
还可以使用命令
chkconfig --add postgresql,设置服务开机自启。(是否自启动看需求)
systemctl管理pgsql
此步骤看需求,我比较喜欢上面步骤启停
cat <<EOF > /usr/lib/systemd/system/postgresql.service
[Unit]
Description=PostgreSQL database server
After=network.target

[Service]
Type=forking
User=postgres
Group=postgres

OOMScoreAdjust=-1000
Environment=PG_OOM_ADJUST_FILE=/proc/self/oom_score_adj
Environment=PG_OOM_ADJUST_VALUE=0
Environment=PGDATA=/AppHome/postgresql/data
Environment=PGLOG=/AppHome/postgresql/logs/pgsql.log

ExecStart=/AppHome/postgresql/bin/pg_ctl start -D \${PGDATA} -s -l \${PGLOG}
ExecStop=/AppHome/postgresql/bin/pg_ctl stop -D \${PGDATA} -s -m fast
ExecReload=//AppHome/postgresql/bin/pg_ctl reload -D \${PGDATA} -s

TimeoutSec=300
KillMode=mixed

[Install]
WantedBy=multi-user.target
EOF
设置自动启动
chmod a+x /usr/lib/systemd/system/postgresql.service
systemctl enable postgresql.service
systemctl start postgresql.service
添加TimeScaleDB插件
编译安装cmake
TimeScaleDB的编译需要使用cmake工具,CentOS7.9国内yum源提供的版本为2.8,不满足TimeScaleDB的要求。
因此从cmake官网获取二进制发行版直接临时替换编译(也可下载源码进行编译),下载地址:https://cmake.org/download/
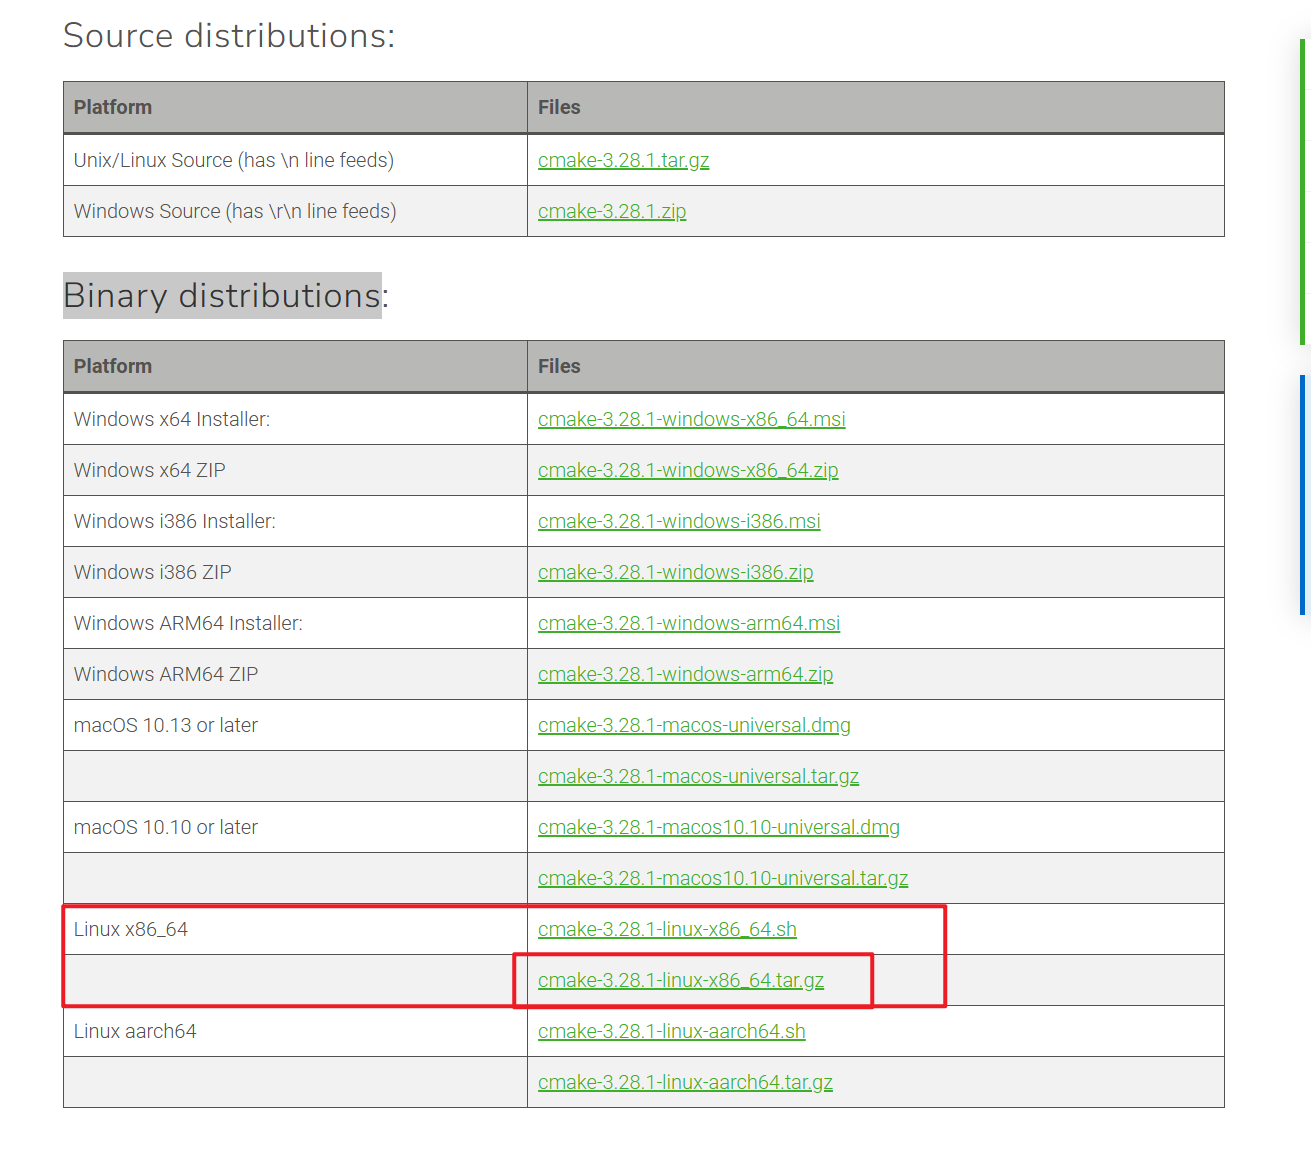
# 解压二进制发行版文件
cd /usr/local/src/
tar -zxvf cmake-3.28.1-linux-x86_64.tar.gz
cd cmake-3.28.1-linux-x86_64/bin
#测试能否直接调用
./cmake --version|head -n 1

# 替换cmame
mv /usr/bin/cmake /usr/bin/cmake_2.8
ln -s /usr/local/src/cmake-3.28.1-linux-x86_64/bin/cmake /usr/bin/
编译安装TimeScaleDB
TimeScaleDB插件需从Github项目中下载:https://github.com/timescale/timescaledb
编译安装成功后timescaledb插件模块会存放于postgresql的lib目录下,通过修改pgsql的配置文件开启模块支持。
# 解压TimeScaleDB安装包
cd /usr/local/src/
tar -zxvf timescaledb-2.13.1.tar.gz

# 编译检查配置项
cd /opt/src/timescaledb-2.11.0
#./bootstrap -DREGRESS_CHECKS=OFF #提示openssl缺失执行下面
./bootstrap -DPG_CONFIG=/AppHome/postgresql/bin/pg_config -DUSE_OPENSSL=0

# 构建TimeScaleDB
cd ./build
make -j8 && make install
修改pgsql的配置文件
postgresql.conf配置是会在第一次启动pgsql服务时生成在pgsql的data目录下的
# 添加TimeScaleDB共享库到pgsql的配置文件
su - postgres
sed -i "s/#shared_preload.*/shared_preload_libraries = 'timescaledb'/g" /AppHome/postgresql-14/data/postgresql.conf

# 2.重启postgresql
/etc/init.d/postgresql restart
pgsql加载TimeScaleDB验证
登录数据库
psql -U postgres -d postgres
# 登录数据库
psql -U postgres -d postgres

# 添加timescaledb插件模块
postgres=# create extension timescaledb;
WARNING:
WELCOME TO
 _____ _                               _     ____________
|_   _(_)                             | |    |  _  \ ___ \
  | |  _ _ __ ___   ___  ___  ___ __ _| | ___| | | | |_/ /
  | | | |  _ ` _ \ / _ \/ __|/ __/ _` | |/ _ \ | | | ___ \
  | | | | | | | | |  __/\__ \ (_| (_| | |  __/ |/ /| |_/ /
  |_| |_|_| |_| |_|\___||___/\___\__,_|_|\___|___/ \____/

For more information on TimescaleDB, please visit the following links:

 1. Getting started: https://docs.timescale.com/timescaledb/latest/getting-started
 2. API reference documentation: https://docs.timescale.com/api/latest
 3. How TimescaleDB is designed: https://docs.timescale.com/timescaledb/latest/overview/core-concepts

Note: TimescaleDB collects anonymous reports to better understand and assist our users.
For more information and how to disable, please see our docs https://docs.timescale.com/timescaledb/latest/how-to-guides/configuration/telemetry.

CREATE EXTENSION
postgres=#
安全设置修改密码
因未设置postgres密码,安全期间必须设置
# 登录pgsql修改当前用户密码
psql
ALTER USER postgres WITH PASSWORD 'newpassword';
题外记录-源码编译cmake
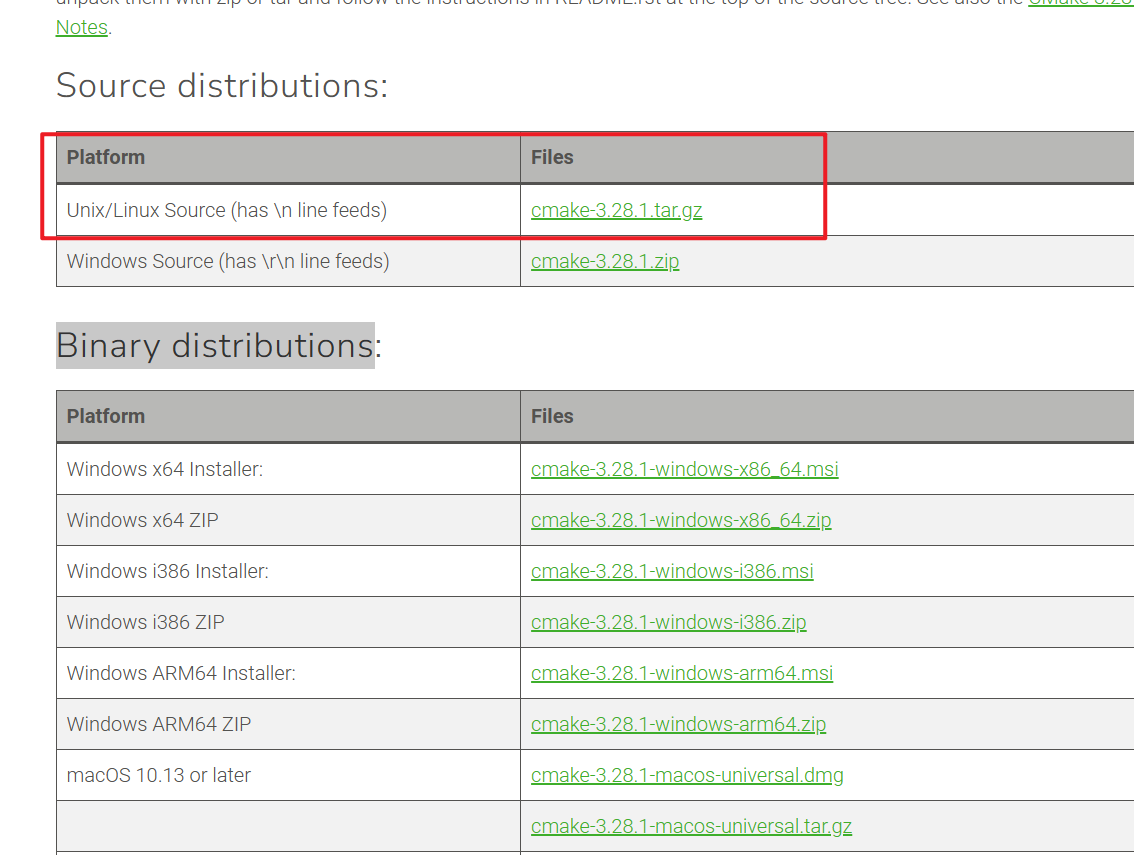
#1.下载至cmake源码包/opt/src目录
#建议下载到本地上传到服务器上
https://github.com/Kitware/CMake/releases/download/v3.28.1/

#2.解压camke安装包
cd /opt/src
tar xf cmake-3.28.1.tar.gz

#3.编译和构建cmake
cd /opt/src/cmake-3.28.1
./configure --prefix=/usr/local/cmake
make -j4 && make install

# 4.创建系统bin目录下的cmake软链接
ln -s /usr/local/cmake/bin/cmake /usr/bin/cmake
ln -s /usr/local/cmake/bin/ccmake /usr/bin/ccmake
ln -s /usr/local/cmake/bin/cpack /usr/bin/cpack
ln -s /usr/local/cmake/bin/ctest /usr/bin/ctest

# 5.测试能否直接调用
cmake --version|head -n 1
> cmake version 3.28.1
参考
1.https://blog.51cto.com/u_15100301/6865616
2.https://199604.com/2074
3.https://github.com/timescale/timescaledb/releases/tag/2.13.1
4.https://cmake.org/download/
5.https://mp.weixin.qq.com/s/S84jFIWXTy1onVff_D8TrQ
6.https://mp.weixin.qq.com/s/VeTklamheoQdcqlHBx9hjw
大佬又开始发技术文章了,学习了.
叫小郭就好,我不是大佬~