SRS搭建小型高可用集群服务
方案
因为方案考虑到后期客户不会给您太多机器,因此部署SRS搭建小型高可用集群服务也需要6台吧,肯定也有不完美的地方

我用了6台服务器,都是1H2G的配置进行验证(都关闭防火墙)
源站:
192.168.100.41-42
边缘:
192.168.100.45-46
边缘服务器后期是可以无限添加的,只要有资源即可
Ha-nginx:
192.168.100.43-44
参考:https://mp.weixin.qq.com/s/pd9YQS0WR3hSuHybkm1F7Q (最佳实践:如何扩展你的SRS并发能力)
Haproxy的安装和配置
haproxy是安装在192.168.100.43上的,用于负载源站。
系统使用的是Centos 7.6,因为是实验性Haproxy,因为直接Yum安装了:yum -y install haproxy
修改配置文件
/etc/haproxy/haproxy.cfg
配置内容如下(其实就是注释掉了我不需要的,主配置没动,添加了源站转发):
#---------------------------------------------------------------------
# Example configuration for a possible web application.  See the
# full configuration options online.
#
#   http://haproxy.1wt.eu/download/1.4/doc/configuration.txt
#
#---------------------------------------------------------------------

#---------------------------------------------------------------------
# Global settings
#---------------------------------------------------------------------
global
    # to have these messages end up in /var/log/haproxy.log you will
    # need to:
    #
    # 1) configure syslog to accept network log events.  This is done
    #    by adding the '-r' option to the SYSLOGD_OPTIONS in
    #    /etc/sysconfig/syslog
    #
    # 2) configure local2 events to go to the /var/log/haproxy.log
    #   file. A line like the following can be added to
    #   /etc/sysconfig/syslog
    #
    # local2.*                       /var/log/haproxy.log
    #
    log         127.0.0.1 local2

    chroot      /var/lib/haproxy
    pidfile     /var/run/haproxy.pid
    maxconn     4000
    user        haproxy
    group       haproxy
    daemon

    # turn on stats unix socket
    stats socket /var/lib/haproxy/stats

#---------------------------------------------------------------------
# common defaults that all the 'listen' and 'backend' sections will
# use if not designated in their block
#---------------------------------------------------------------------
defaults
    mode                    tcp
    log                     global
    option                  tcplog
    option                  dontlognull
    option http-server-close
    option forwardfor       except 127.0.0.0/8
    option                  redispatch
    retries                 3
    timeout http-request    10s
    timeout queue           1m
    timeout connect         10s
    timeout client          1m
    timeout server          1m
    timeout http-keep-alive 10s
    timeout check           10s
    maxconn                 3000

#---------------------------------------------------------------------
# main frontend which proxys to the backends
#---------------------------------------------------------------------
#frontend  main *:5000
#    acl url_static       path_beg       -i /static /images /javascript /stylesheets
#    acl url_static       path_end       -i .jpg .gif .png .css .js
#
#    use_backend static          if url_static
#    default_backend             app

#---------------------------------------------------------------------
# static backend for serving up images, stylesheets and such
#---------------------------------------------------------------------
#backend static
#    balance     roundrobin
#    server      static 127.0.0.1:4331 check

#---------------------------------------------------------------------
# round robin balancing between the various backends
#---------------------------------------------------------------------
#backend app
#    balance     roundrobin
#    server  app1 127.0.0.1:5001 check
#    server  app2 127.0.0.1:5002 check
#    server  app3 127.0.0.1:5003 check
#    server  app4 127.0.0.1:5004 check

listen srs-cluster
    bind *:1935
    mode tcp
    balance roundrobin
    server master1 192.168.100.141:1935
    server master2 192.168.100.142:1935
验证配置文件
haproxy -f /etc/haproxy/haproxy.cfg -c
启动haproxy
systemctl restart haproxy
SRS 源站安装与配置
SRS 源站集群参考官网:https://github.com/ossrs/srs/wiki/v4_CN_OriginCluster
SRS安装参考:
SRS源站1(192.168.100.41)的配置:
说明下,默认的启动配置应该是srs.conf。我做了备份,修改了这个文件。
# main config for srs.
# @see full.conf for detail config.

#监听的流端口
listen              1935;
#最大连接数
max_connections     1000;
srs_log_tank        file;
srs_log_file        ./objs/srs.log;
daemon              on;
http_api {
    enabled         on;
    listen          1985;
}
http_server {
    enabled         on;
    listen          8080;
    dir             ./objs/nginx/html;
}
rtc_server {
    enabled on;
    listen 8000; # UDP port
    # @see https://github.com/ossrs/srs/wiki/v4_CN_WebRTC#config-candidate
    candidate $CANDIDATE;
}
vhost __defaultVhost__ {
    hls {
        enabled         on;
        hls_fragment    10;
        hls_window      60;
        hls_path        ./objs/nginx/html;
        hls_m3u8_file   [app]/[stream].m3u8;
        hls_ts_file     [app]/[stream]-[seq].ts;
    }
    http_remux {
        enabled     on;
        mount       [vhost]/[app]/[stream].flv;
    }
#    rtc {
#        enabled     on;
#        # @see https://github.com/ossrs/srs/wiki/v4_CN_WebRTC#rtmp-to-rtc
#        rtmp_to_rtc off;
#        # @see https://github.com/ossrs/srs/wiki/v4_CN_WebRTC#rtc-to-rtmp
#        rtc_to_rtmp off;
#    }
     cluster {
        #集群的模式,对于源站集群,值应该是local。
        mode            local;
        #是否开启源站集群
        origin_cluster  on;
        #源站集群中的其他源站的HTTP API地址
        coworkers       192.168.100.142:1985;
     }
}
启动服务:
systemcty restart srs
SRS源站2(192.168.100.142)的配置:
# main config for srs.
# @see full.conf for detail config.

#监听的流端口
listen              1935;
#最大连接数
max_connections     1000;
srs_log_tank        file;
srs_log_file        ./objs/srs.log;
daemon              on;
http_api {
    enabled         on;
    listen          1985;
}
http_server {
    enabled         on;
    listen          8080;
    dir             ./objs/nginx/html;
}
rtc_server {
    enabled on;
    listen 8000; # UDP port
    # @see https://github.com/ossrs/srs/wiki/v4_CN_WebRTC#config-candidate
    candidate $CANDIDATE;
}
vhost __defaultVhost__ {
    hls {
        enabled         on;
        hls_fragment    10;
        hls_window      60;
        hls_path        ./objs/nginx/html;
        hls_m3u8_file   [app]/[stream].m3u8;
        hls_ts_file     [app]/[stream]-[seq].ts;
    }
    http_remux {
        enabled     on;
        mount       [vhost]/[app]/[stream].flv;
    }
#    rtc {
#        enabled     on;
#        # @see https://github.com/ossrs/srs/wiki/v4_CN_WebRTC#rtmp-to-rtc
#        rtmp_to_rtc off;
#        # @see https://github.com/ossrs/srs/wiki/v4_CN_WebRTC#rtc-to-rtmp
#        rtc_to_rtmp off;
#    }
     cluster {
        #集群的模式,对于源站集群,值应该是local。
        mode            local;
        #是否开启源站集群
        origin_cluster  on;
        #源站集群中的其他源站的HTTP API地址
        coworkers       192.168.100.141:1985;
     }
}
启动服务:
systemcty restart srs
两份配置文件差异只在 最后一个 coworkers,写出了自己以外的源站IP即可
测试
使用ffmpeg推流到负载均衡192.168.100.143
#!/bin/sh
for((;;)); do

    ffmpeg -re -i /root/test.flv -vcodec copy -acodec copy -f flv -y rtmp://192.168.100.143/live/livestream;
    sleep 1;

done
SRS 边缘安装与配置
边缘的配置都是一样的,是通过NG来进行负载的,所以说边缘的配置相对简单,并且是可以无限扩展的
SRS 边缘集群参考:
- Edge Cluster: RTMP: 如何部署RTMP分发集群,譬如CDN支持RTMP分发。
- Edge Cluster: FLV: 如何部署HTTP-FLV分发集群,譬如CDN支持HTTP-FLV分发。
- Edge Cluster: HLS: 如何部署HLS分发集群,比如CDN支持HLS分发。
SRS安装参考:
SRS edge 配置文件
# main config for srs.
# @see full.conf for detail config.

#监听的流端口
listen              1935;
#最大连接数
max_connections     1000;
srs_log_tank        file;
srs_log_file        ./objs/srs.log;
daemon              on;
http_api {
    enabled         on;
    listen          1985;
}
http_server {
    enabled         on;
    listen          8080;
    dir             ./objs/nginx/html;
}
rtc_server {
    enabled on;
    listen 8000; # UDP port
    # @see https://github.com/ossrs/srs/wiki/v4_CN_WebRTC#config-candidate
    candidate $CANDIDATE;
}
vhost __defaultVhost__ {
    hls {
        enabled         on;
        hls_fragment    10;
        hls_window      60;
        hls_path        ./objs/nginx/html;
        hls_m3u8_file   [app]/[stream].m3u8;
        hls_ts_file     [app]/[stream]-[seq].ts;
    }
    http_remux {
        enabled     on;
        mount       [vhost]/[app]/[stream].flv;
        hstrs       on;
    }
     cluster {
        #集群的模式,对于源站集群,remote。
        mode            remote;
        #源站集群中的其他源站的HTTP API地址
        origin       192.168.100.141:1935 192.168.100.142:1935;
     }
}
最重要就是最后两行了,一个是 Mode和源站地址,源站地址使用的应该是1935端口
启动服务:
systemcty restart srs
nginx 安装和配置
nginx 安装省略,直接使用rpm包安装的
配置文件:
#[root@host144 nginx]# cat /etc/nginx/conf.d/default.conf
upstream srs{
  server 192.168.100.145:8080;
  server 192.168.100.146:8080;
}

server {
    listen       80;
    server_name  192.168.100.144;


   location ~ /* {
      proxy_pass http://srs;
      add_header Cache-Control no-cache;
      add_header Access-Control-Allow-Origin *;
    }


    #禁止访问的文件或目录
    location ~ ^/(\.user.ini|\.htaccess|\.git|\.svn|\.project|LICENSE|README.md)
    {
        return 404;
    }

    #一键申请SSL证书验证目录相关设置
    location ~ \.well-known{
        allow all;
    }

    location ~ .*\.(gif|jpg|jpeg|png|bmp|swf)$
    {
        expires      30d;
        error_log /dev/null;
        access_log /dev/null;
    }

    location ~ .*\.(js|css)?$
    {
        expires      12h;
        error_log /dev/null;
        access_log /dev/null;
    }
    #access_log  /var/log/nginx/192.168.100.144.log;
    #error_log  /var/log/nginx/192.168.100.144.error.log;
}
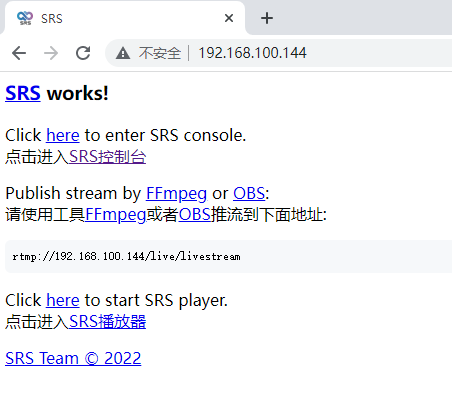
在浏览器中访问http://192.168.100.144

牛批啊哥!
别这样。我都卷不过你呢